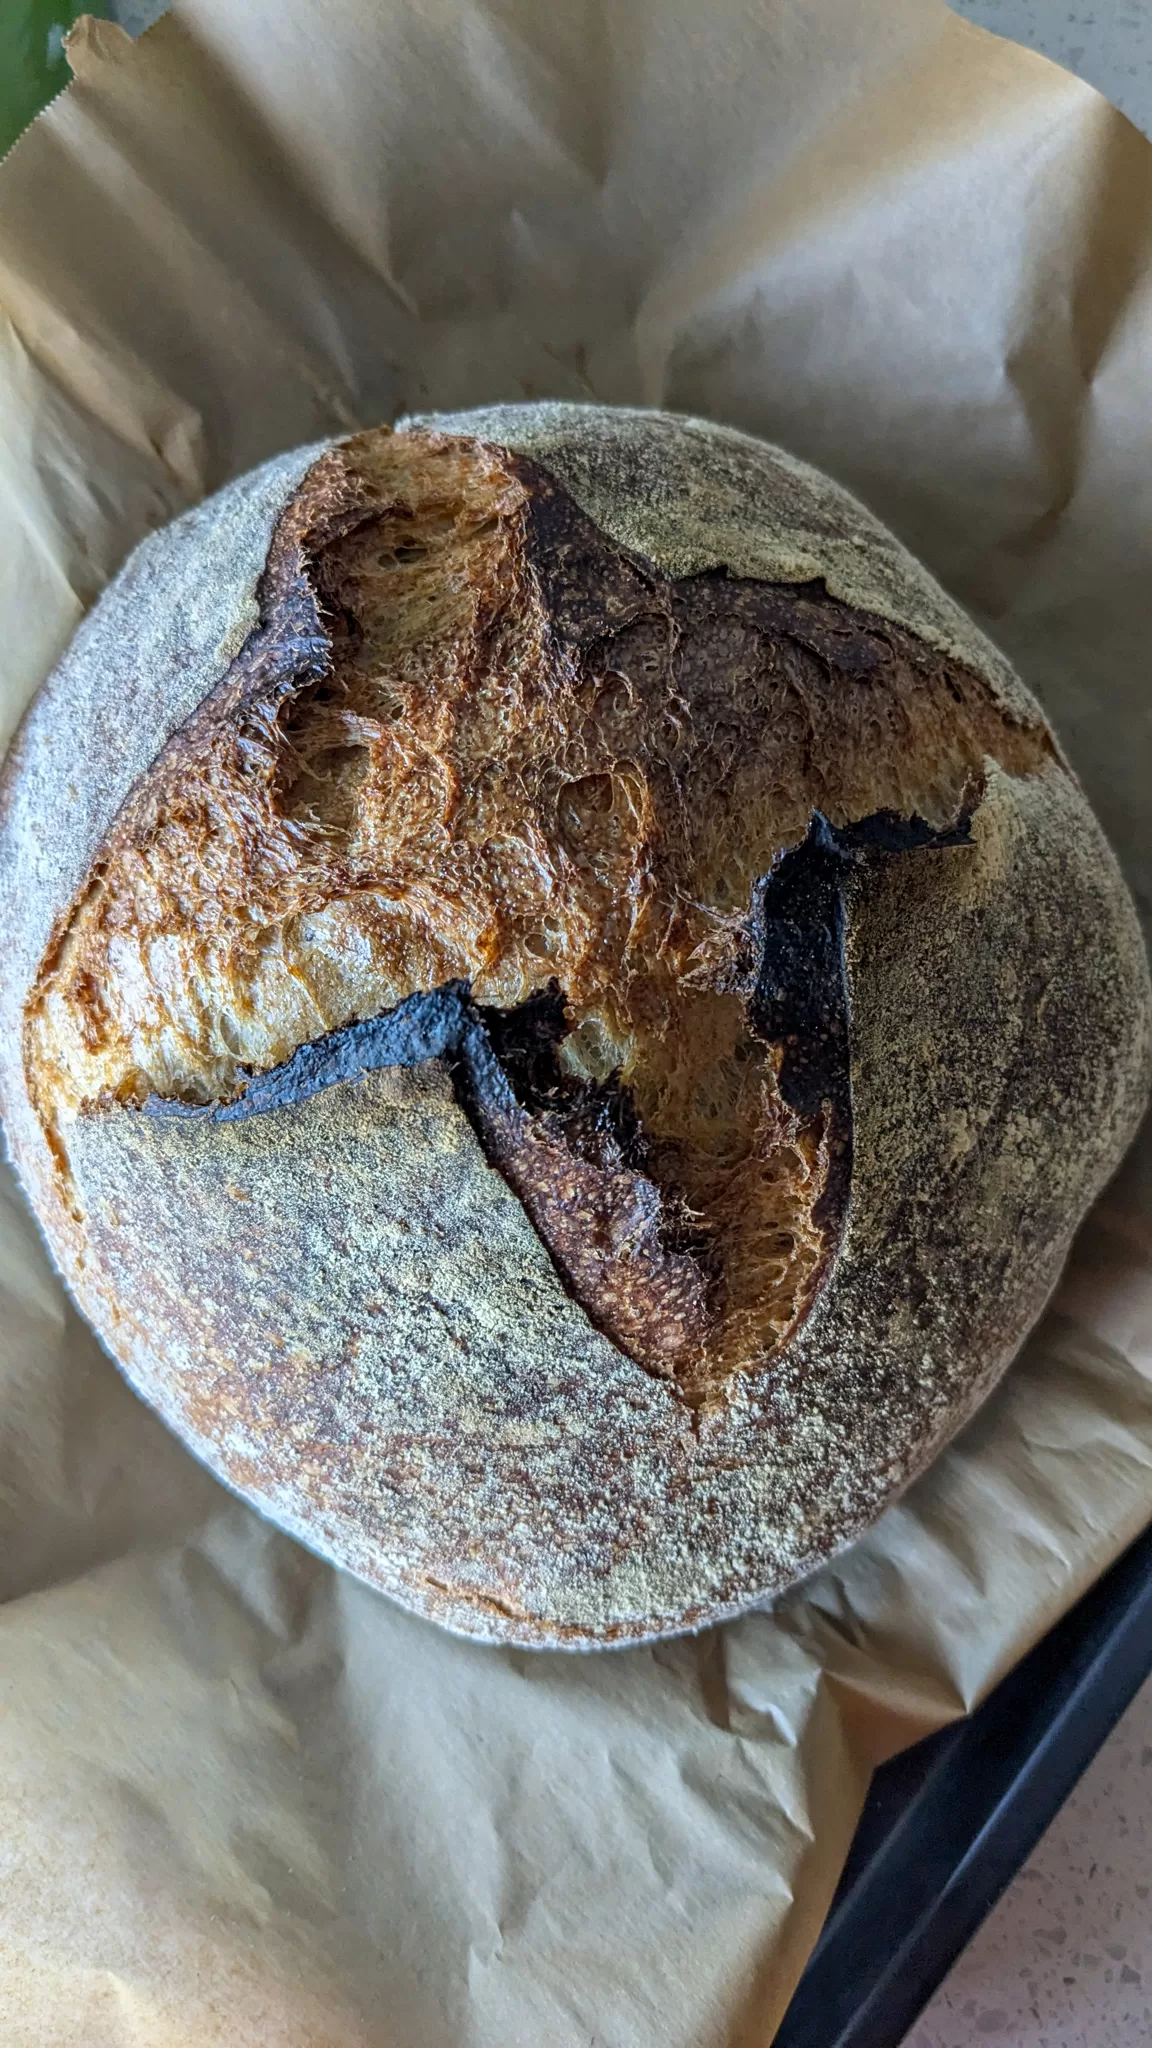
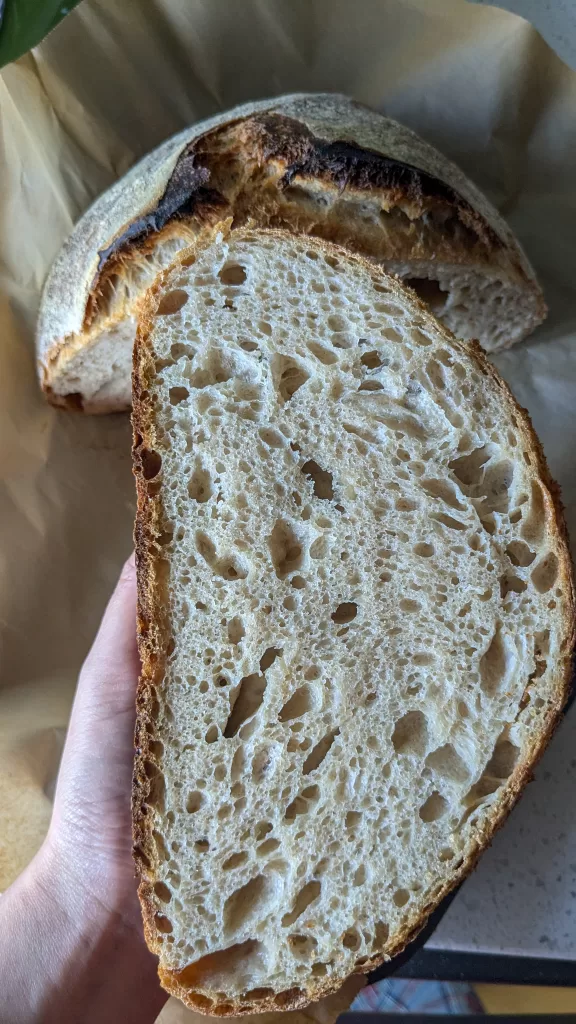
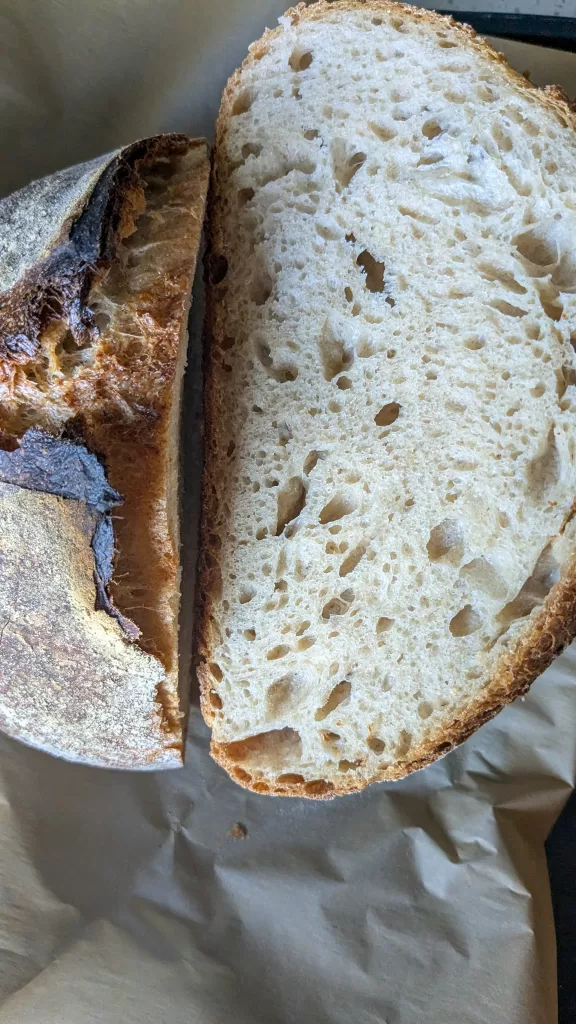
NO-KNEAD SOURDOUGH BREAD LOAF = EFFORTLESS
Give your hands and muscles a break, because this bread is effortless.
This post includes affiliate links. If you decide to click or make a purchase, I may earn a commission. Thank you for your support!
NO-KNEAD TO PANIC!
But this no-knead sourdough bread loaf takes little to no effort at all to make. Some of the struggle that we have when making bread is the labor and time, but what if I told you that this requires no kneading and can be baked in the same day?! You’re welcome.
Don’t be intimidated by the making this sourdough bread! This simple, no-knead recipe makes it easy for anyone to enjoy the delicious, tangy flavor of homemade sourdough. Even though this doesn’t require any kneading, you won’t be missing it.
NOTES BEFORE YOU BAKE
- When covering the bowl you can use:
- cling wrap + a towel or waxed canvas
- shower cap
- a container with a lid
- Mise en place! Put everything in place; separate the ingredients by weight. Accuracy is important.
- Dissolving the salt in the water first will help to evenly disperse the sodium in the loaf.
NO-KNEAD SOURDOUGH BREAD LOAF RECIPE
total time
8 hours
yield
1
Ingredients
- 385 grams – bread flour
- 43 grams – whole wheat flour
- 268 grams – water 1 (room temperature)
- 77 grams – ripe sourdough starter, 100% hydration
- 22 grams – water 2 (room temperature)
- 7 grams – kosher salt
Tools
- kitchen scale
- mixing bowls
- bread scraper
- rubber spatula
- cling wrap or something to cover your bowl and bread basket.
Steps
1
Autolyse: add the flour, water 1, and sourdough starter. Mix with rubber spatula, then with your hands until there are no dry bits. Cover the bowl and let rest for 30 minutes.
2
Mix: Add the salt to the water 2, stir to dissolve. Mix by hand until incorporated and the dough comes together in a single mass.
3
Bulk fermentation: At room temp (23-24 C), bulk should take about 3.5 hours. Give the dough four sets of stretches and folds. First two sets are at 15-minute intervals, and last two are 30-minute intervals.
4
Pre-shape: The dough should be bubbly, smooth, and elastic with significant rise. Scrape the dough out of the bulk fermentation container on to the counter. Shape each piece into a loose round and let rest for 30 minutes, uncovered.
5
Shape: Shape each piece as a boule and place the dough in the proofing basket.
6
Proof: cover the baskets with plastic wrap or a bag. Place the baskets in the refrigerator overnight.
7
OPTIONAL: let proof on the counter for about 2 hours until a poke to the dough slowly springs back.
8
Bake: Preheat oven 450 F (230 C).
9
Cut out a piece of parchment paper that fits inside the Dutch oven. Place the Dutch oven inside with the lid and bottom side-by-side. If you proofed the dough in the fridge, overnight take it out.
10
Take the cut piece of parchment paper, fit it over the basket and place a baking sheet or cutting board on top. Use both hands to flip the entire stack over.
11
Remove the basket carefully and score the dough. Remove the dutch oven from the heated oven and carefully place the scored dough into the Dutch oven.
12
Place the hot lid on the dutch oven covering it up and bake for 20 minutes covered at 450 F.
13
Remove the lid and finish baking for 30-35 minutes at 400 F, or until done. Internal temp should be 205-210 F (96-99 C).
14
Remove the loaf to a cooling rack for 2 hours before slicing. and place the Dutch oven to the oven (without parchment paper) and bring it back to temp to bake the second loaf.