THE PEANUT BUTTER COOKIE YOU ALWAYS WANTED
I’m excited to say that this is the first cookie recipe, to be reviewed and tested from “All About Cookies” – Christina Tosi. This cookie has a buttery and peanutty flavor that is almost nostalgic for me and dare I say it, its GLUTEN-FREE!

This post includes affiliate links. If you decide to click or make a purchase, I may earn a commission. Thank you for your support!
WHAT IS A SANDIE?
Cousin to the shortie which Christina Tosi mentions in the beginning of “Sandies & Sammies”. What it really is…a derivative to the French shortbread sable (translated French-English: “sandy”) cookie.
THE REVIEW
First, I want to say is get a good quality peanut butter, the one that you REALLY like. I chose the honey roasted peanut butter that you can dispense/mill yourself at Whole Foods. It has the most peanutty flavor with not a lot of sugar, and it is so dang good. For the “flour” I used a brown rice cereal because I like the flavor and it was the only rice cereal available to me at Whole Foods. To make the flour…
Enter your trusty food processor, but if you’re feeling adventurous, grab your pestle and mortar. The coolest part about this is you can sub out the rice cereal for other goodies like cookies, nuts, pretzels, oats – the possibilities are endless! This time I stuck with the classic rice cereal, but next time, oh boy, next time…
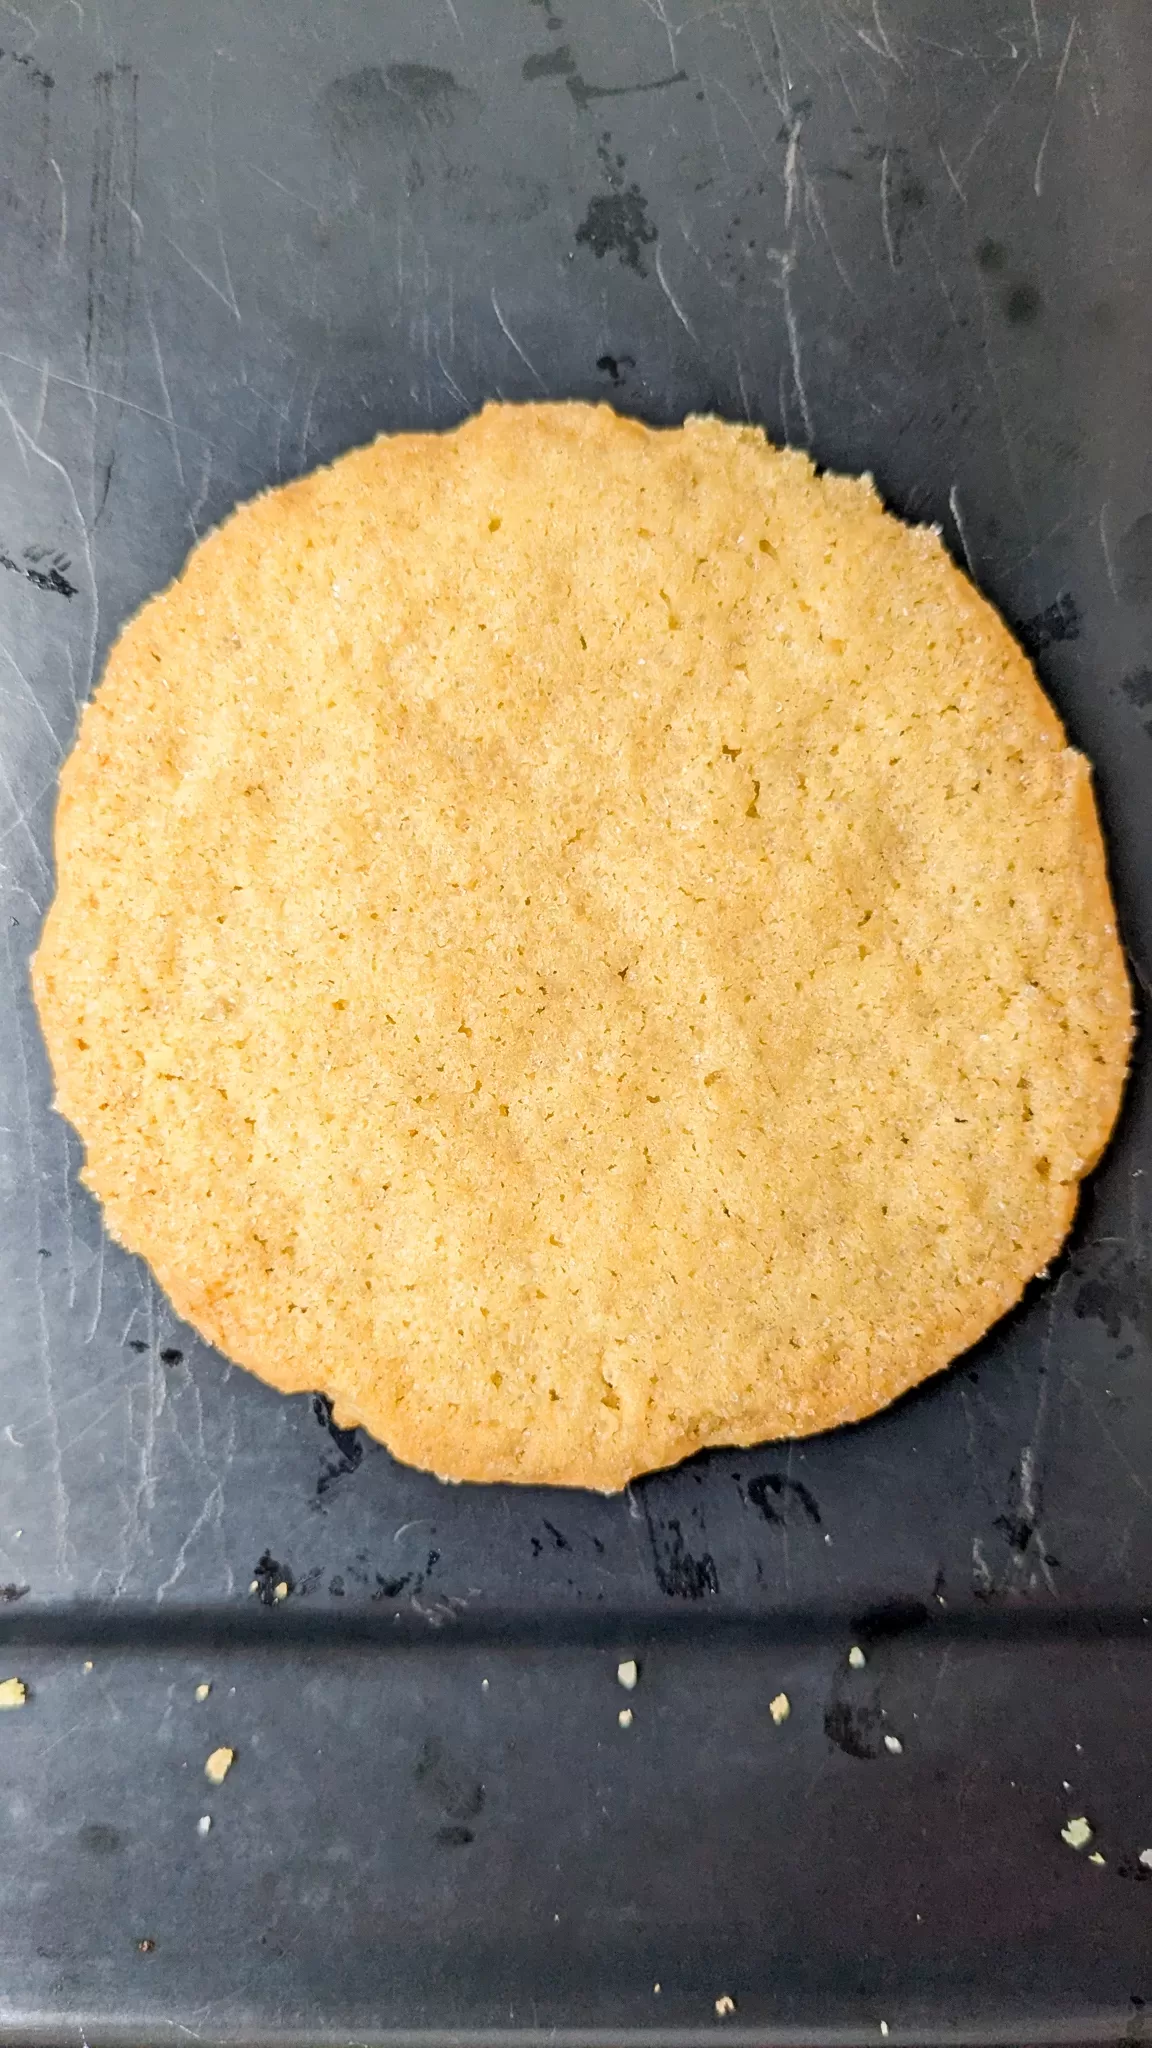
Now, about the baking time and size – things got a little interesting. The recipe suggested a 1/3 cup scoop (if you don’t have a blue scoop), which resulted in GIANT cookies that was slightly bigger than one of my hands. Even though I halved the recipe, I ended up with a few less cookies than expected. Plus, a thickness guide for pressing down the dough would have been amazing.
This cookie recipe was a breeze! It came together in a flash, but with a fun twist: rice Krispie flour. But hey, that’s the beauty of baking, right? A little trial and error, a sprinkle of creativity, and you’ve got a recipe that’s uniquely yours. Stay tuned for my next cookie recipe I will be testing and reviewing from Milk Bar’s Christina Tosi “All About Cookies” cookbook.
TASTE & TEXTURE
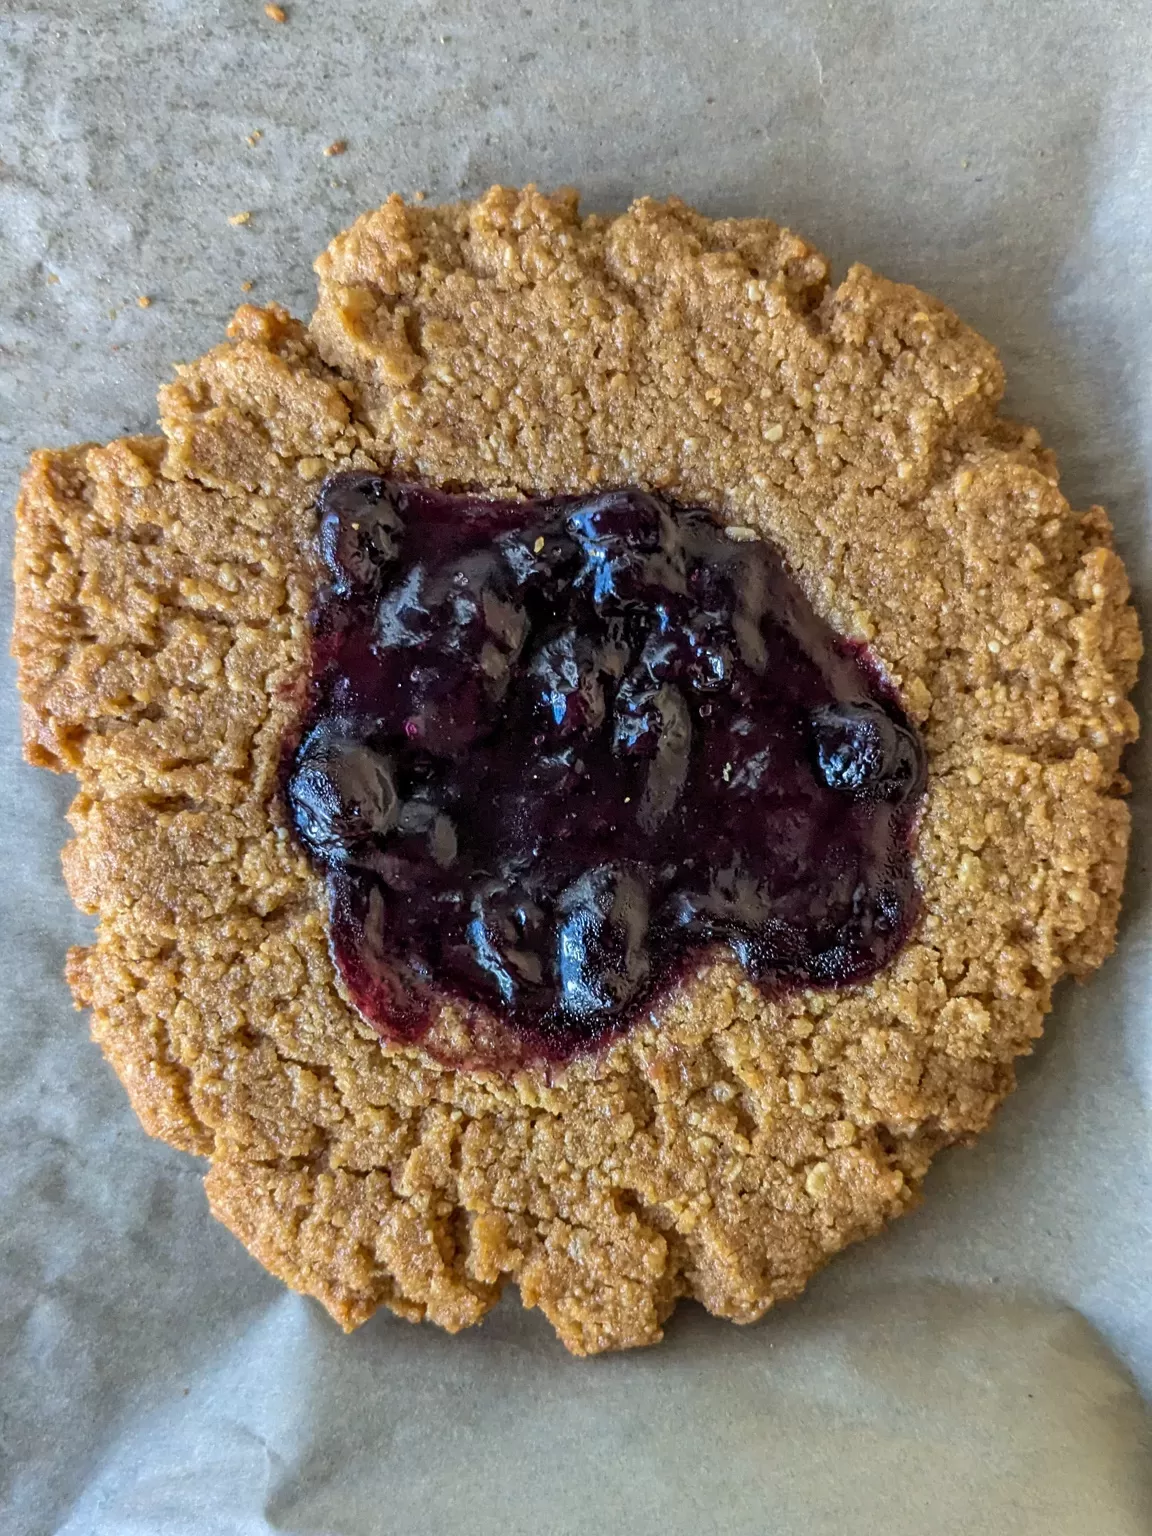
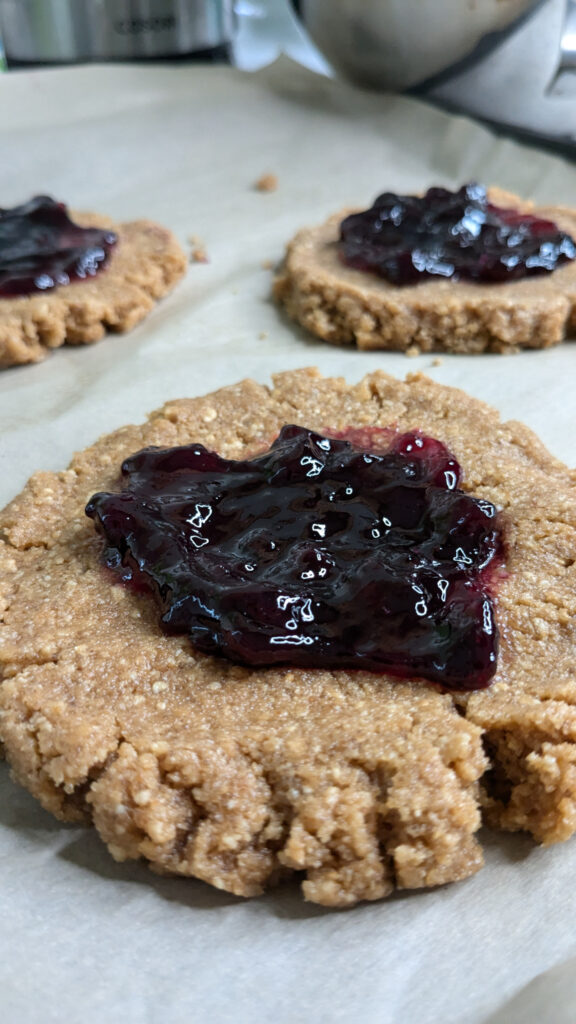
Friends, this cookie is gluten-free! Forget everything you thought you knew about gluten-free cookies. This cookie has that delightful crumbly texture, chewy center, and crisp edges without the dryness or lack a flavor that people think when they hear “gluten-free”. Plus, it packs just the right amount of richness – not quite a butter bomb, but way more exciting than a shortbread. For an extra flavor punch, pair it with a dollop of blueberry jam or a decadent chocolate drizzle.
THINGS THAT I CHANGED
- I don’t know if this is a change, but I used brown rice krispies instead of the traditional rice krispies from our elf friends.
- The peanut butter I used is a fresh milled one that you get to pour yourself into a container because it has the most peanut butter flavor than most jarred ones I’ve tried.
PB SANDIE COOKIE RECIPE
INGREDIENTS
- 130 grams – creamy peanut butter
- 113 grams – light brown sugar
- 56.5 grams – unsalted butter, softened
- 0.5 – large egg (room temperature)
- 4 grams – vanilla extract
- 105 grams – rice krispies, ground to flour
- 1.5 grams – kosher salt
- 1.5 grams – baking soda
- 1 gram – baking powder
- fruit jam & peanut butter (optional)
STEPS
1
Heat the oven to 350 Fahrenheit. Line at least 2 sheet pans with parchment paper or silicone baking mats.
2
In the bowl of a stand mixer with the paddle, cream together the peanut butter, brown sugar, and butter on medium-high for 2-3 minutes until well combined.
3
Scrape down the sides of the bowl.
4
Add the egg and vanilla, and beat until smooth on medium-low, about 1 minute.
5
On low speed, add the Rice Krispies flour, salt, baking soda, and baking powder. Just until the dough comes together, no longer than 1 minute.
6
Scrape down the sides of the bowl with a spatula.
7
Using a cookie scoop (or a 1/3-cup measure), scoop the dough onto a prepared pan 2-3″ apart.
8
Flatten the domed tops with your palm, I like to use the lid of a mason jar (you know, the second piece that doesn’t twist) and pat it down further by using two fingers put together. *See notes
9
If you are adding jelly, use a tablespoon measuring spoon to add an indent and add the jelly. *See notes
10
Bake at 350 F until golden, 10-12 minutes. The bottom should be light golden brown
11
Let the cookies cool on the pans, then transfer to a plate or an airtight container for storage
NOTES
- Storage at room temperature will keep the cookies fresh for 3 days; in the freezer will keep for 1 month.
- If you are using a lid to help flatten the cookie, it will be sticky. Gently peel the cookie off of the lid. You may need to put the cookie dough back together as it may separate or crumble but I use my fingers to flatten out any parts needed so that is a good opportunity to repair any pieces.
- To add jelly on the cookie, I used my tablespoon measurer to indent the cookie and scooped a bit of blueberry jam to put in the indent and spread the overflow. Keep in mind it does add moisture to the cookie and can cause the cookie to crumble more.